Mt. Olomana Trail Hike - Oahu Hawaii

Overview of the Olomana Trail
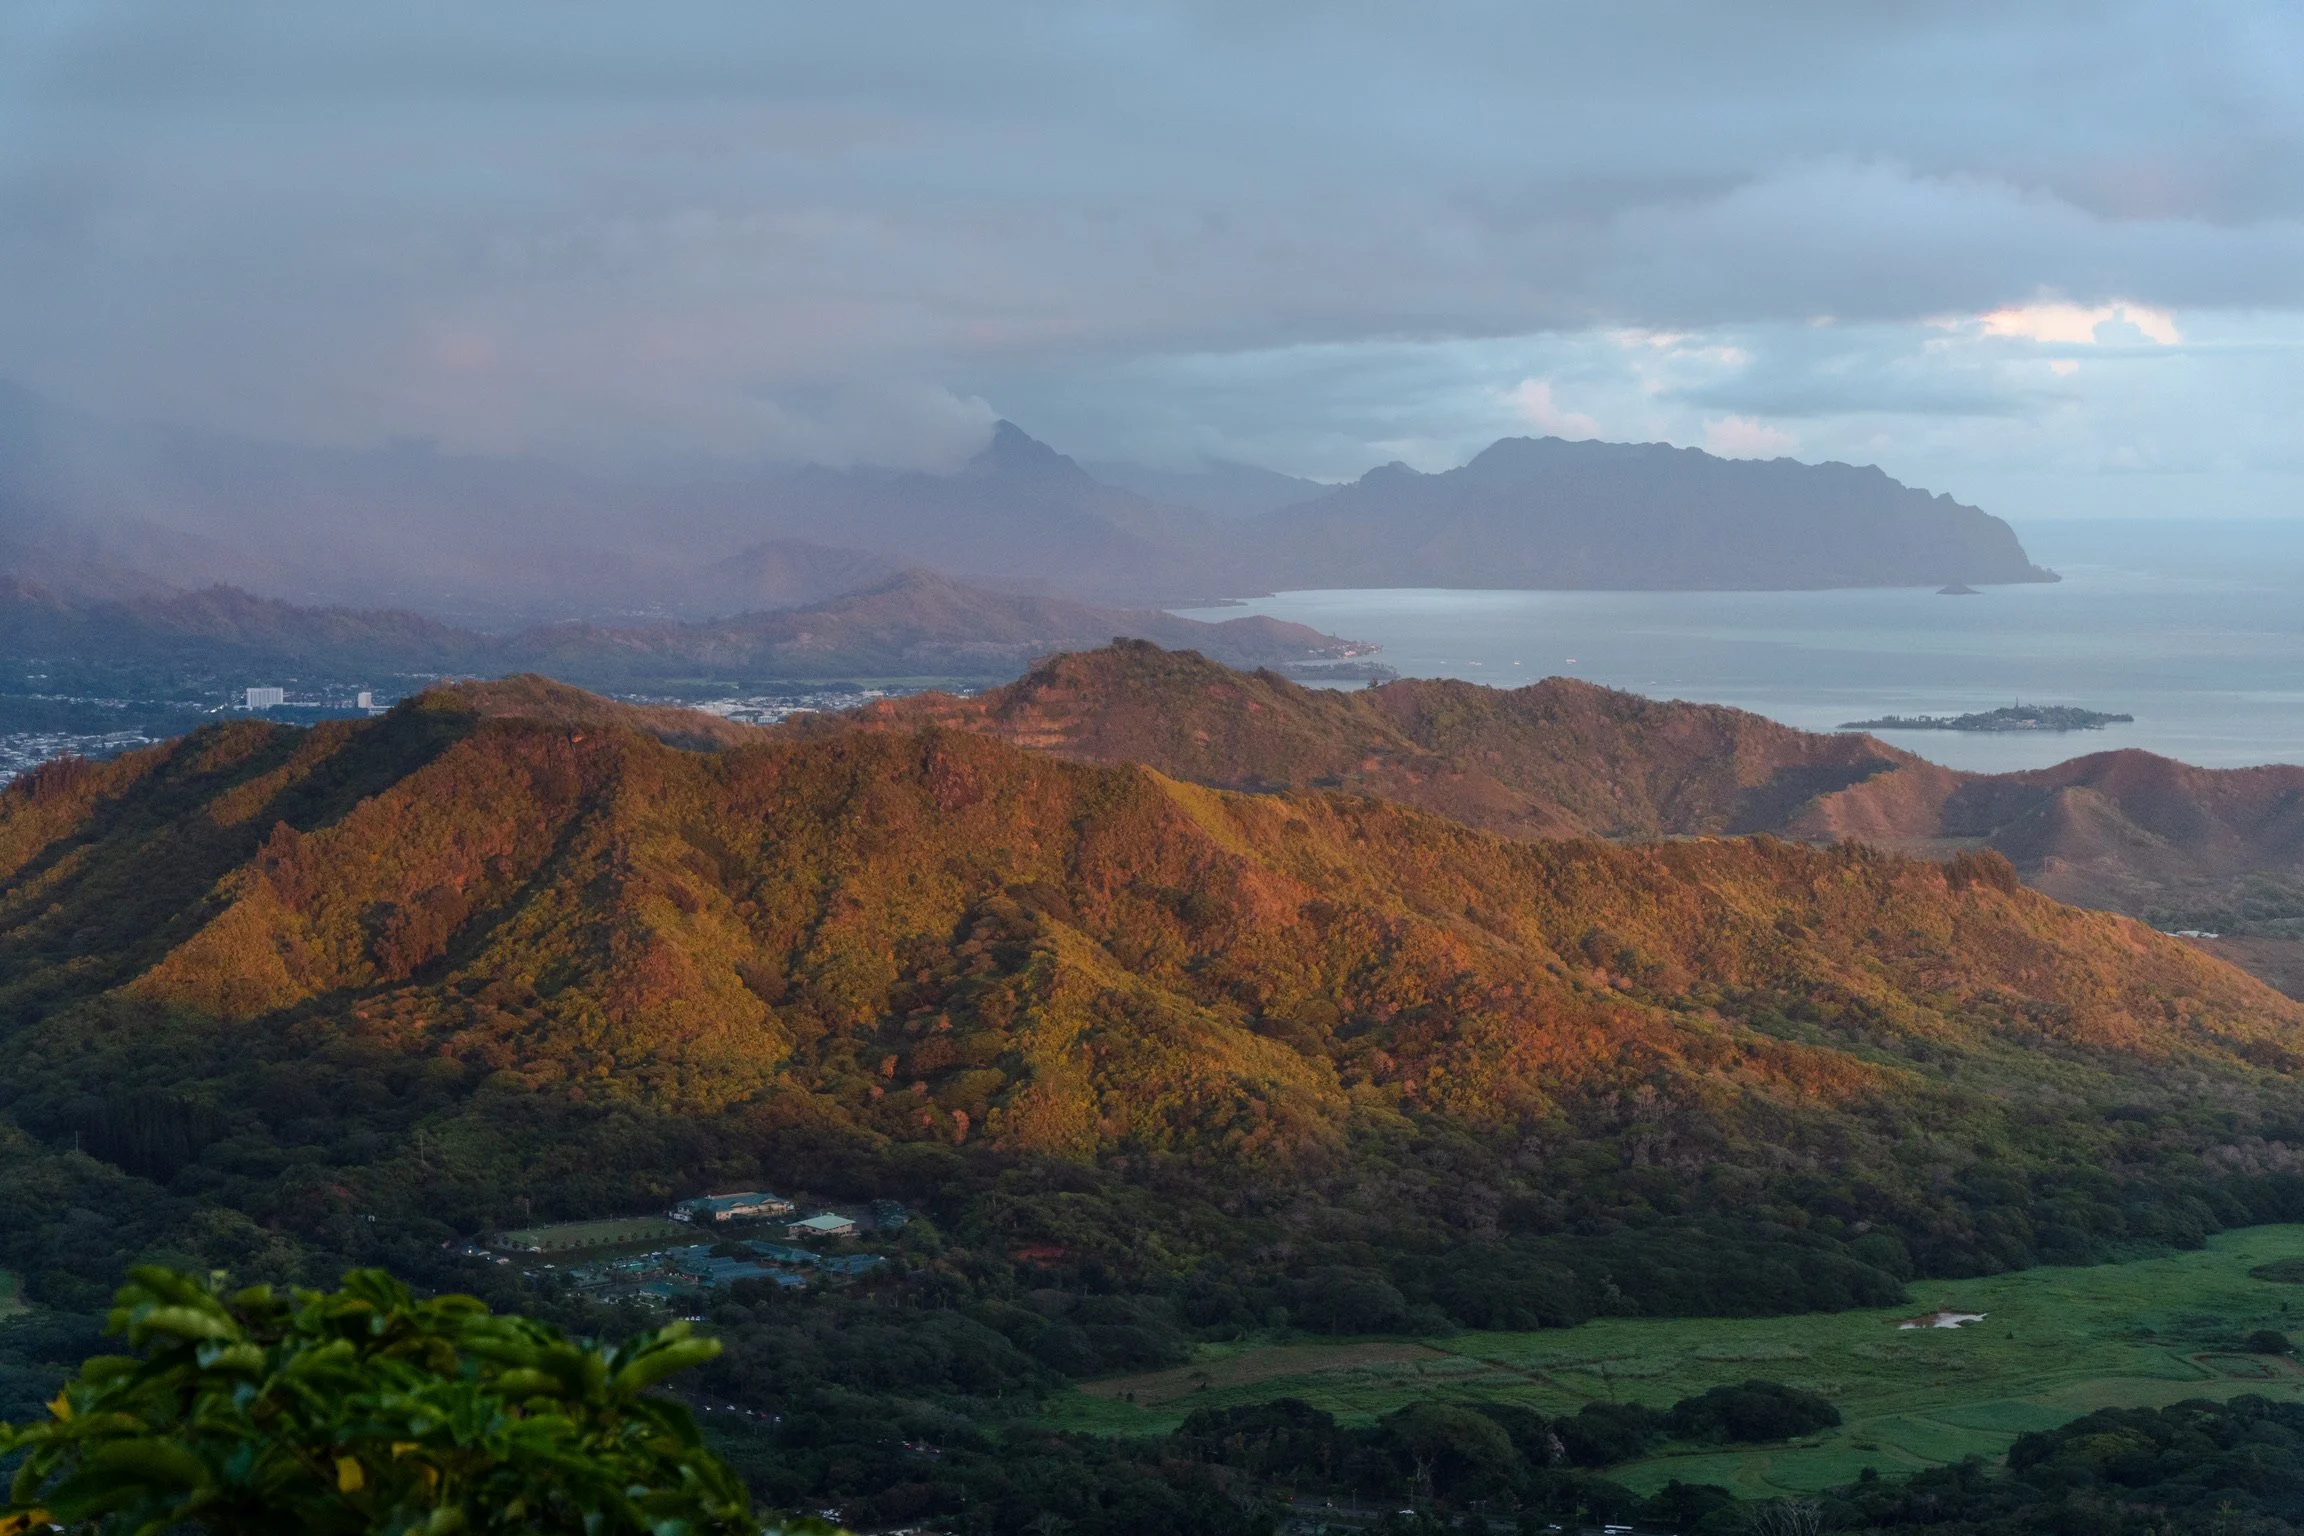
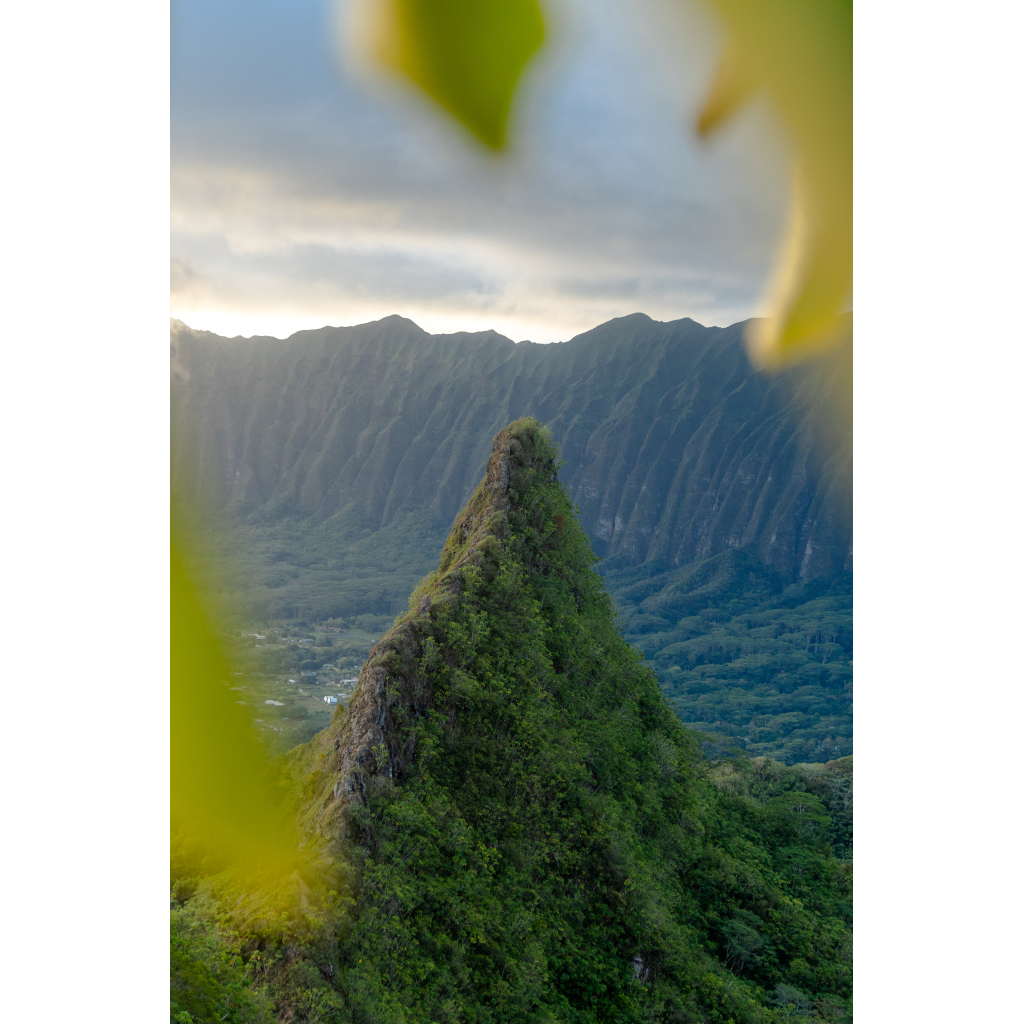
Mount Olomana is located on Oahu’s windward side near Kailua and consists of three distinct peaks. While the first peak sees frequent foot traffic, far fewer hikers continue on to Peaks 2 and 3 — and for good reason.
The trail’s reputation comes from its exposed ridgelines, rope-assisted climbs, and severe drop-offs. Conditions change quickly with weather, and even experienced hikers can find the terrain mentally and physically demanding. Olomana rewards good judgment more than physical strength.
Olomana Trail Quick Stats
Distance: ~4.5 miles round trip
Elevation Gain: ~1,600 feet
Time Required: 3–5 hours
Difficulty: Hard
Trail Type: Out & back
Exposure: High
Recommended Experience: Advanced hikers
Stopping frequently for photos or filming will extend your time — something to factor in before starting. I recommend looking the path up on All Trails or Strava before you climb. The trail is well visible but it never hurts to have a trail map.
Is the Olomana Trail Dangerous?
The Olomana Trail has a reputation that often precedes it, but it’s more accurate to describe it as a serious hike that requires experience and good judgment, rather than one that is inherently unsafe.
The main challenges come from steep terrain, narrow ridge sections, and the need for occasional scrambling — especially beyond Peak 1. In dry conditions, hikers who are comfortable with exposure and have solid footing will find the route challenging but manageable.
Where problems tend to arise is when hikers underestimate the trail, attempt it in poor weather, or continue beyond their comfort level. Knowing when to slow down or turn around is part of hiking Olomana responsibly.
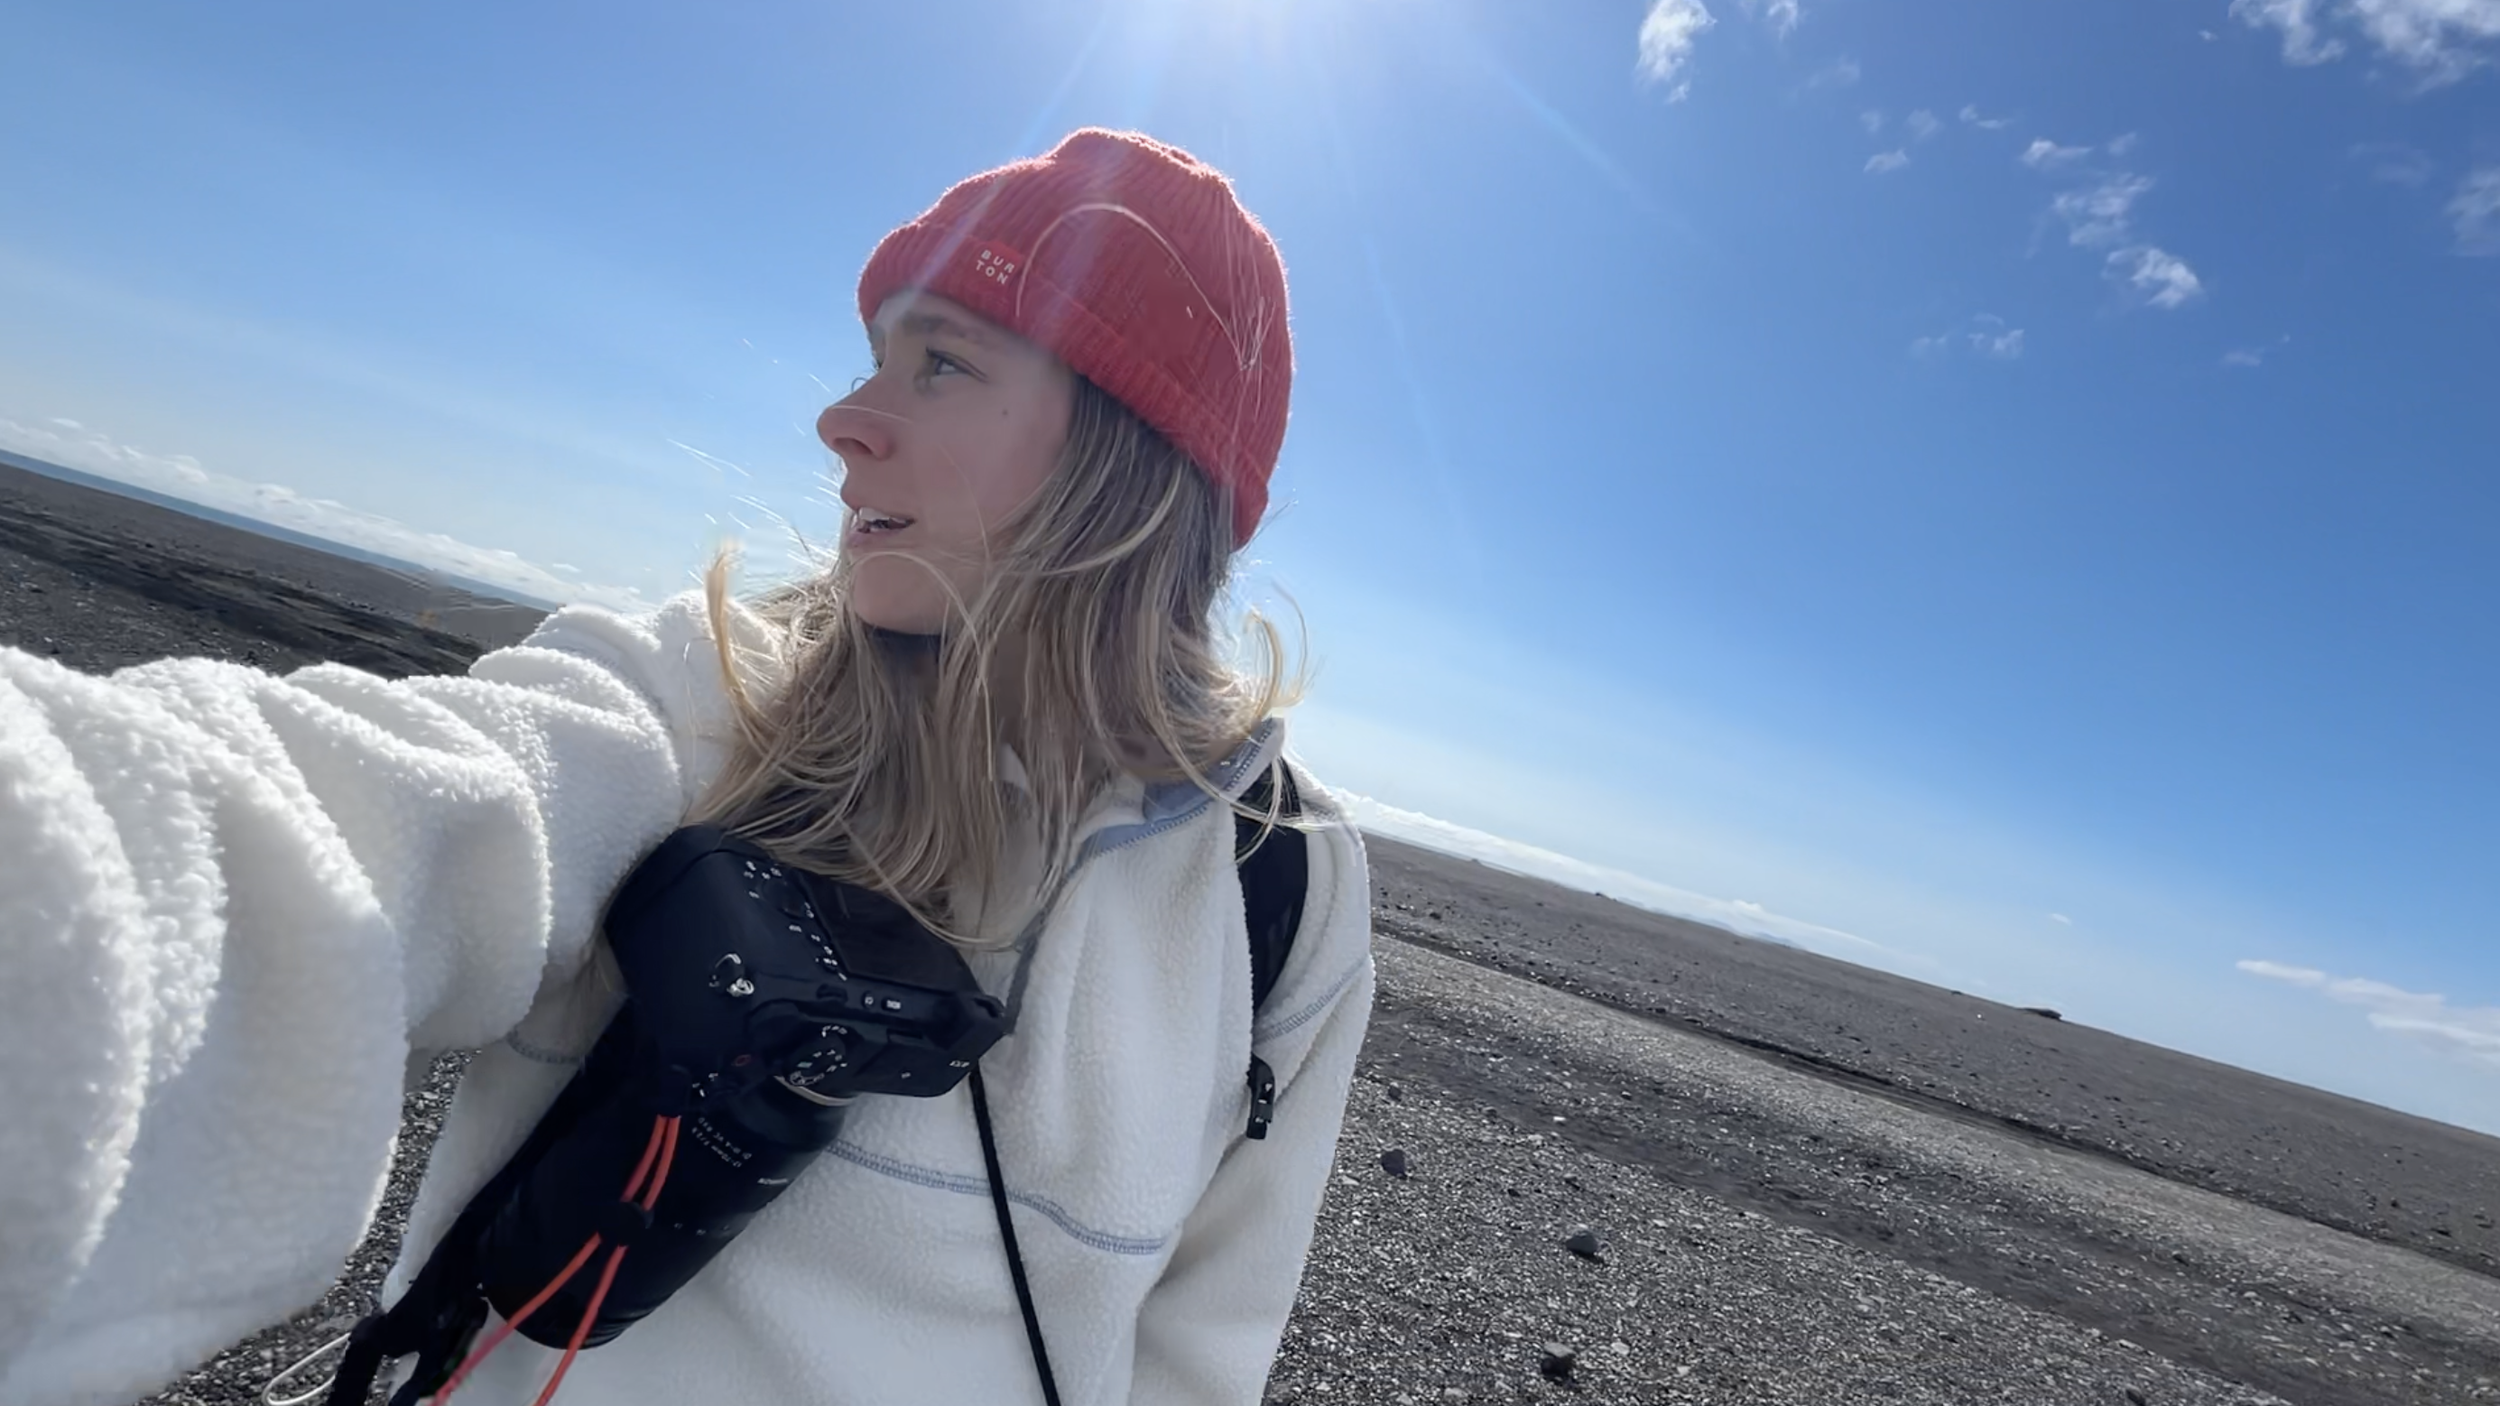
Using a hands-free GoPro setup allowed me to document the hike while staying focused on movement, and I only stopped for still photos when I was on stable ground — an approach I’d recommend to anyone bringing a camera.
Olomana Trail Difficulty: Peak-by-Peak Breakdown
Peak 1: A Steep but Rewarding Start
The hike to Peak 1 is steep and physically demanding, but it’s a good introduction to the terrain you’ll encounter higher up. The trail climbs steadily through forest before opening onto more exposed ridge sections near the summit.
While there are narrow areas, the route to Peak 1 is generally straightforward for strong hikers with good footing. It also offers a preview of the views Olomana is known for, making it a satisfying first milestone.
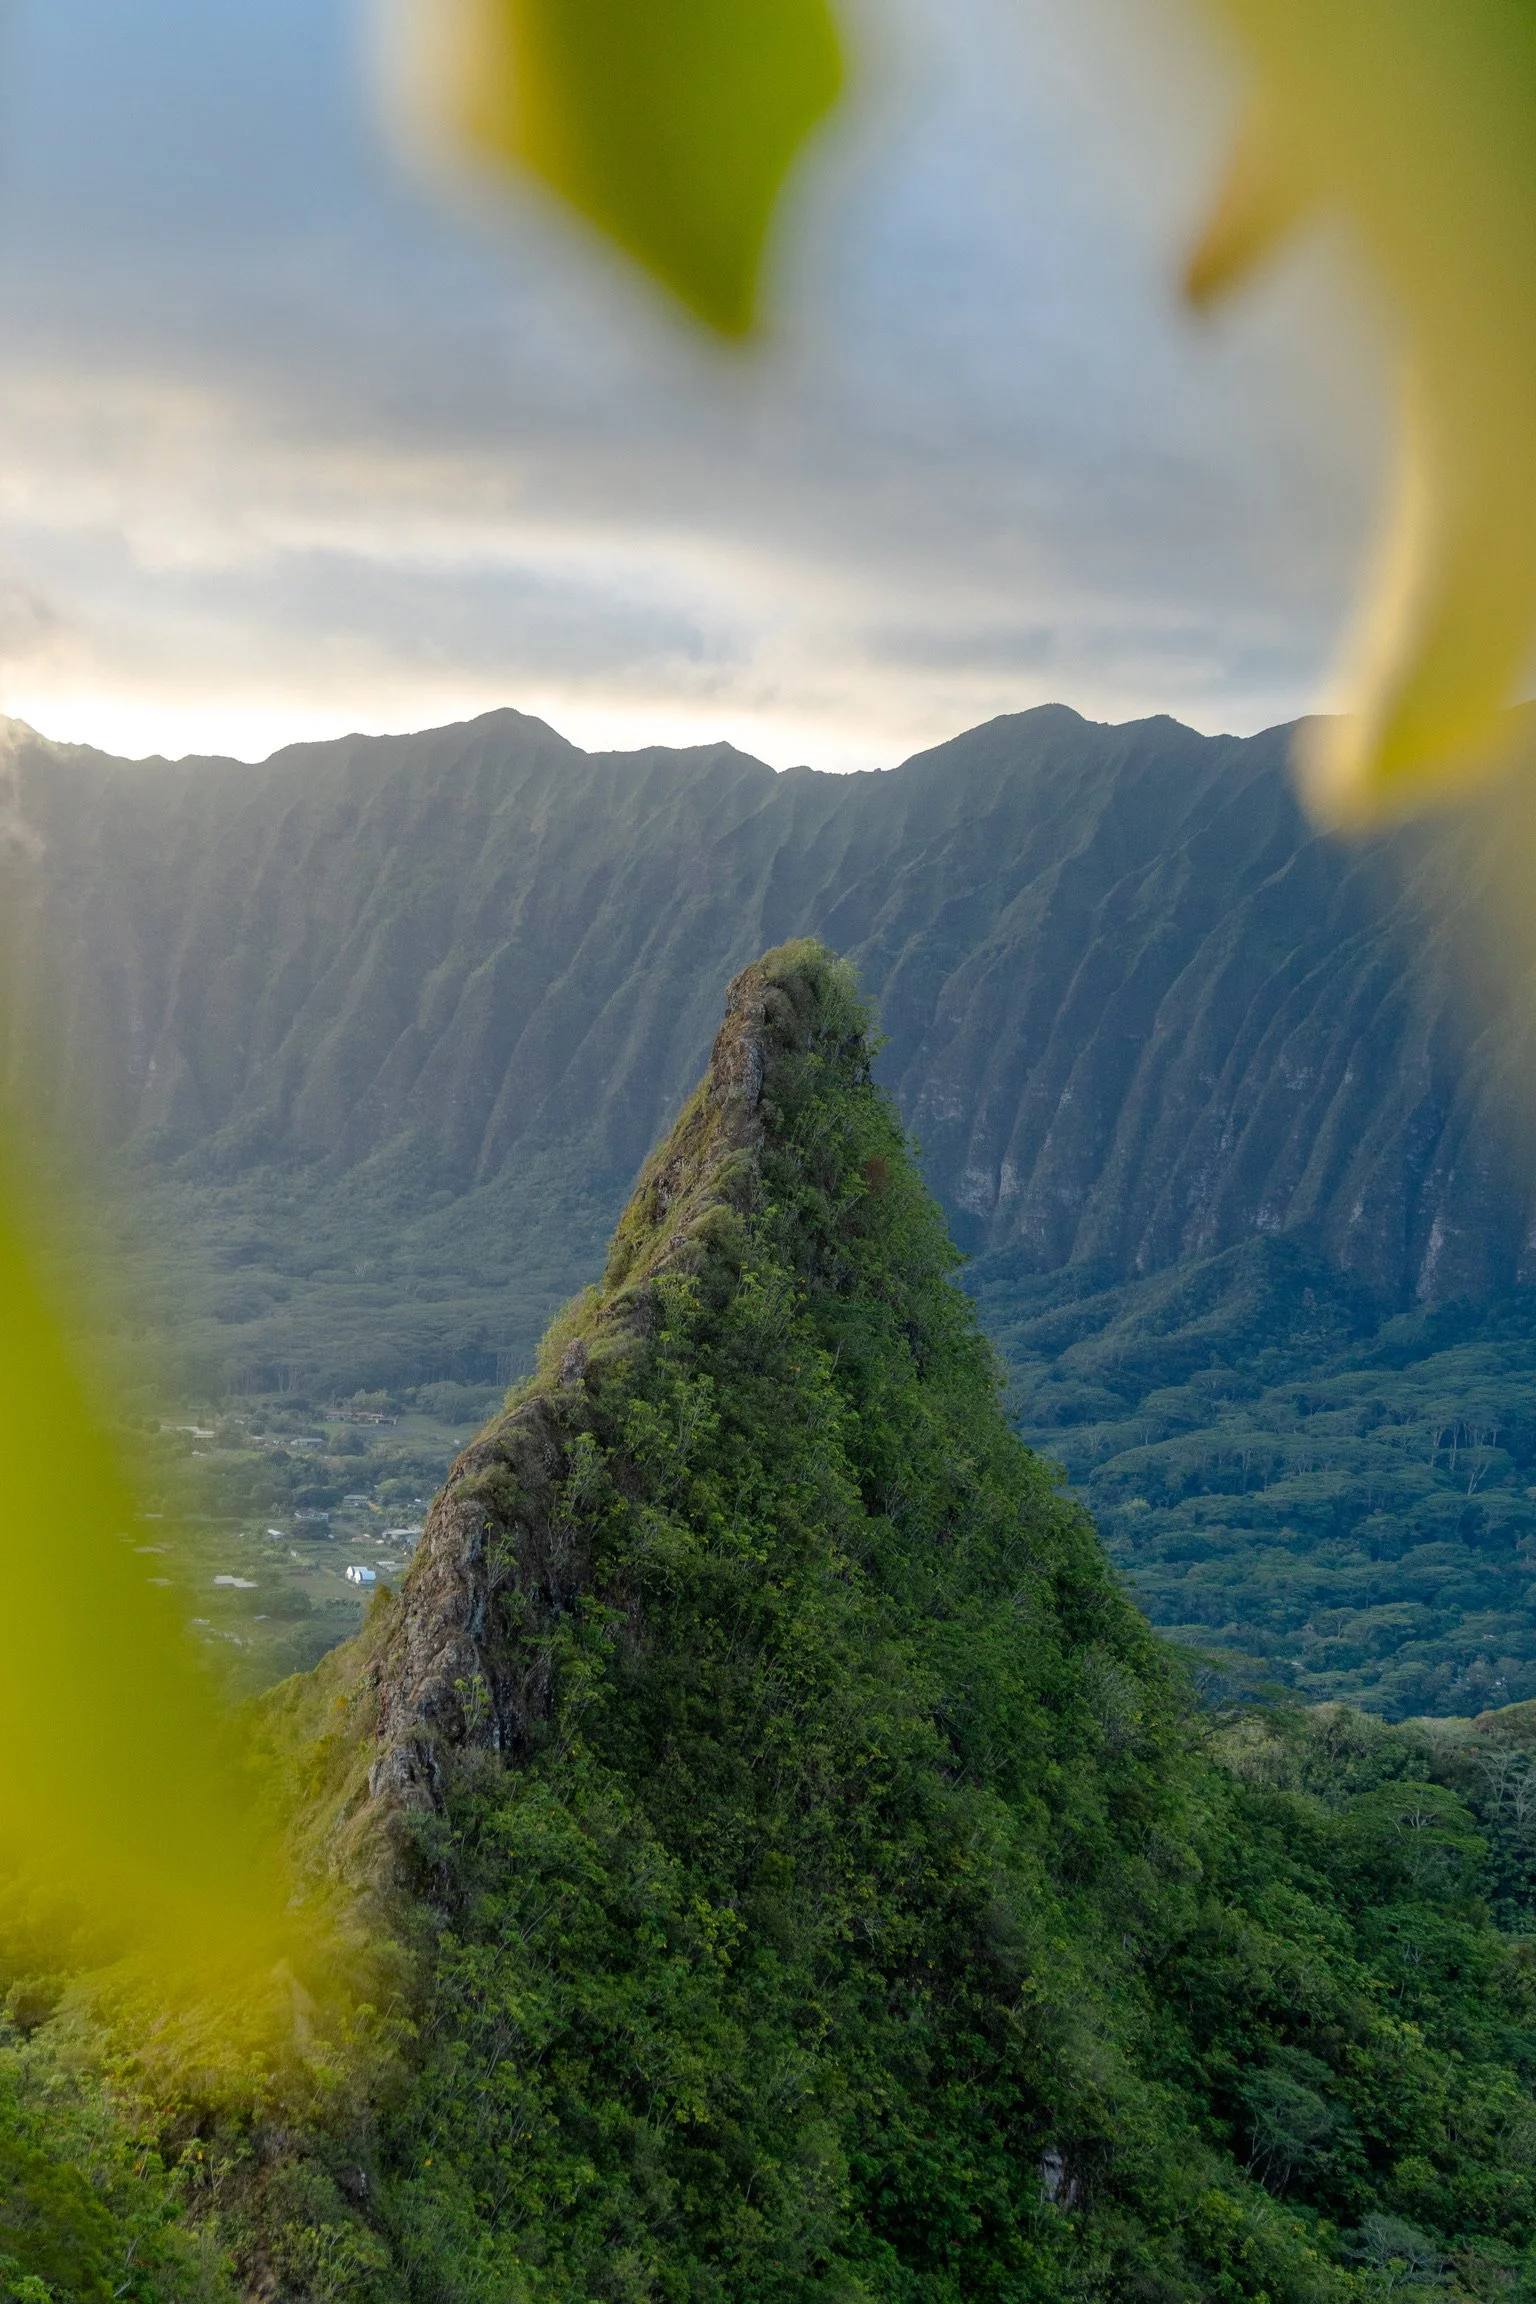
From a photography standpoint, Peak 1 is where the trail begins to open up visually, with sweeping views toward Kailua and the Koʻolau Range.
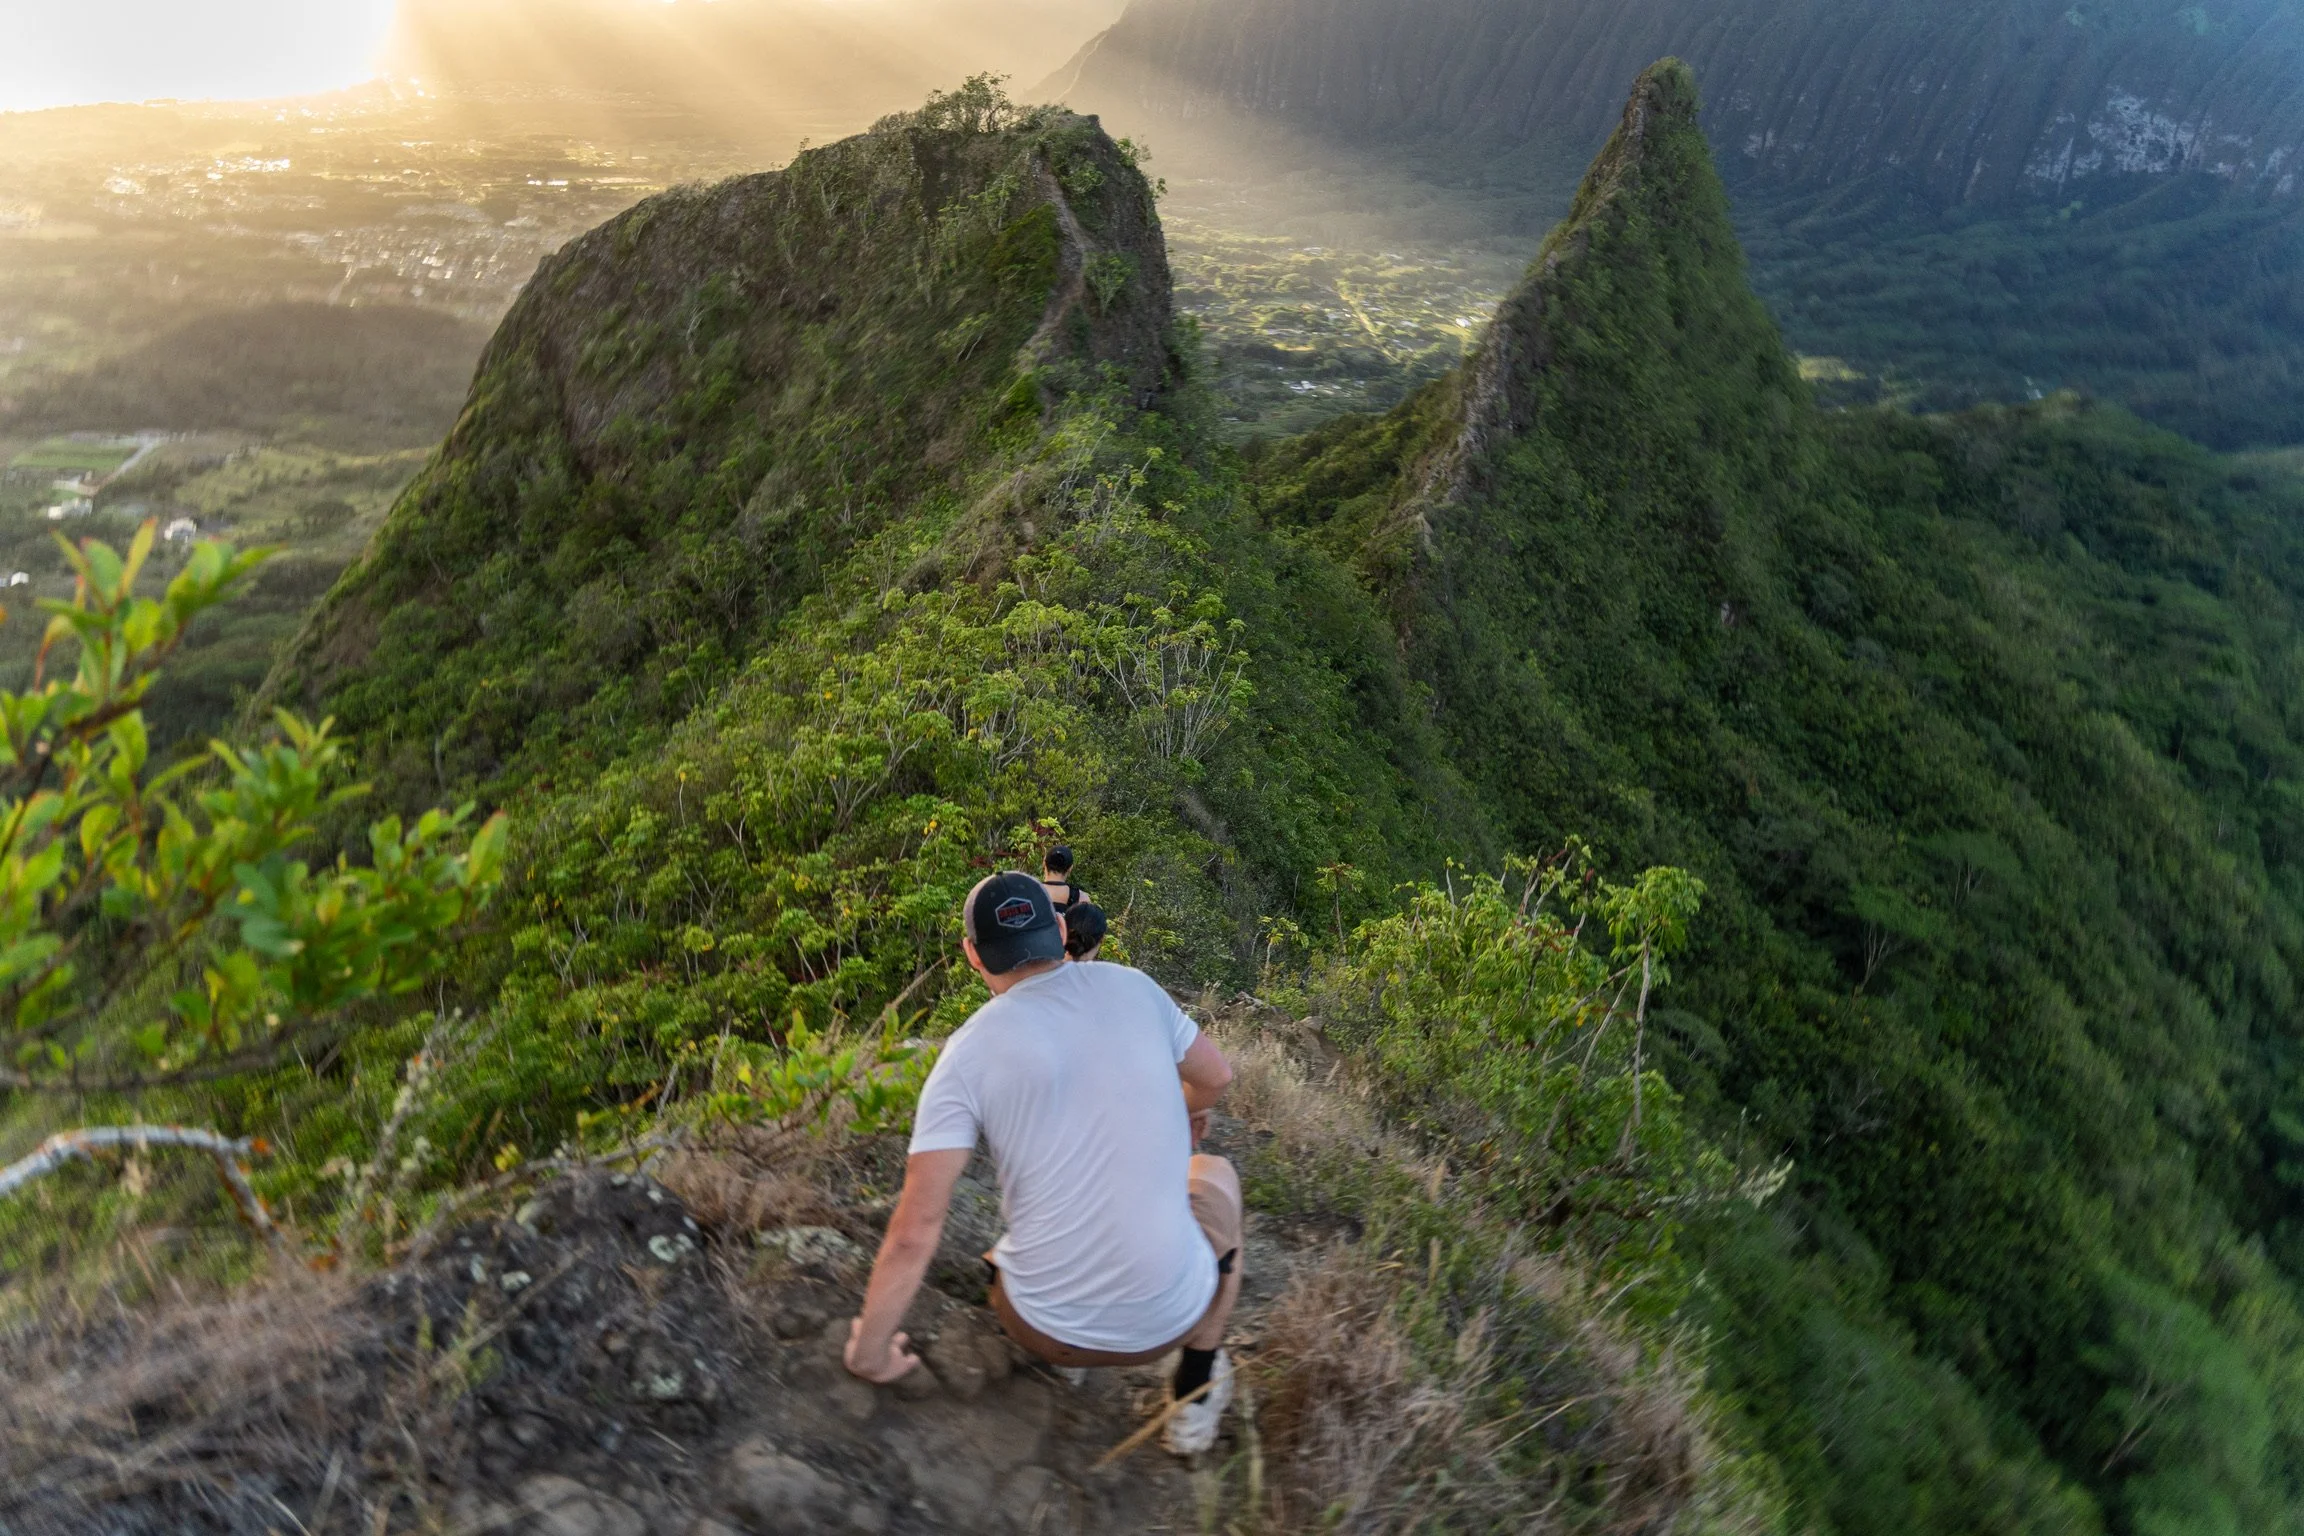
Peak 2: The Most Common Turnaround Point
For many hikers, Peak 2 is where the Olomana Trail reaches its natural stopping point.
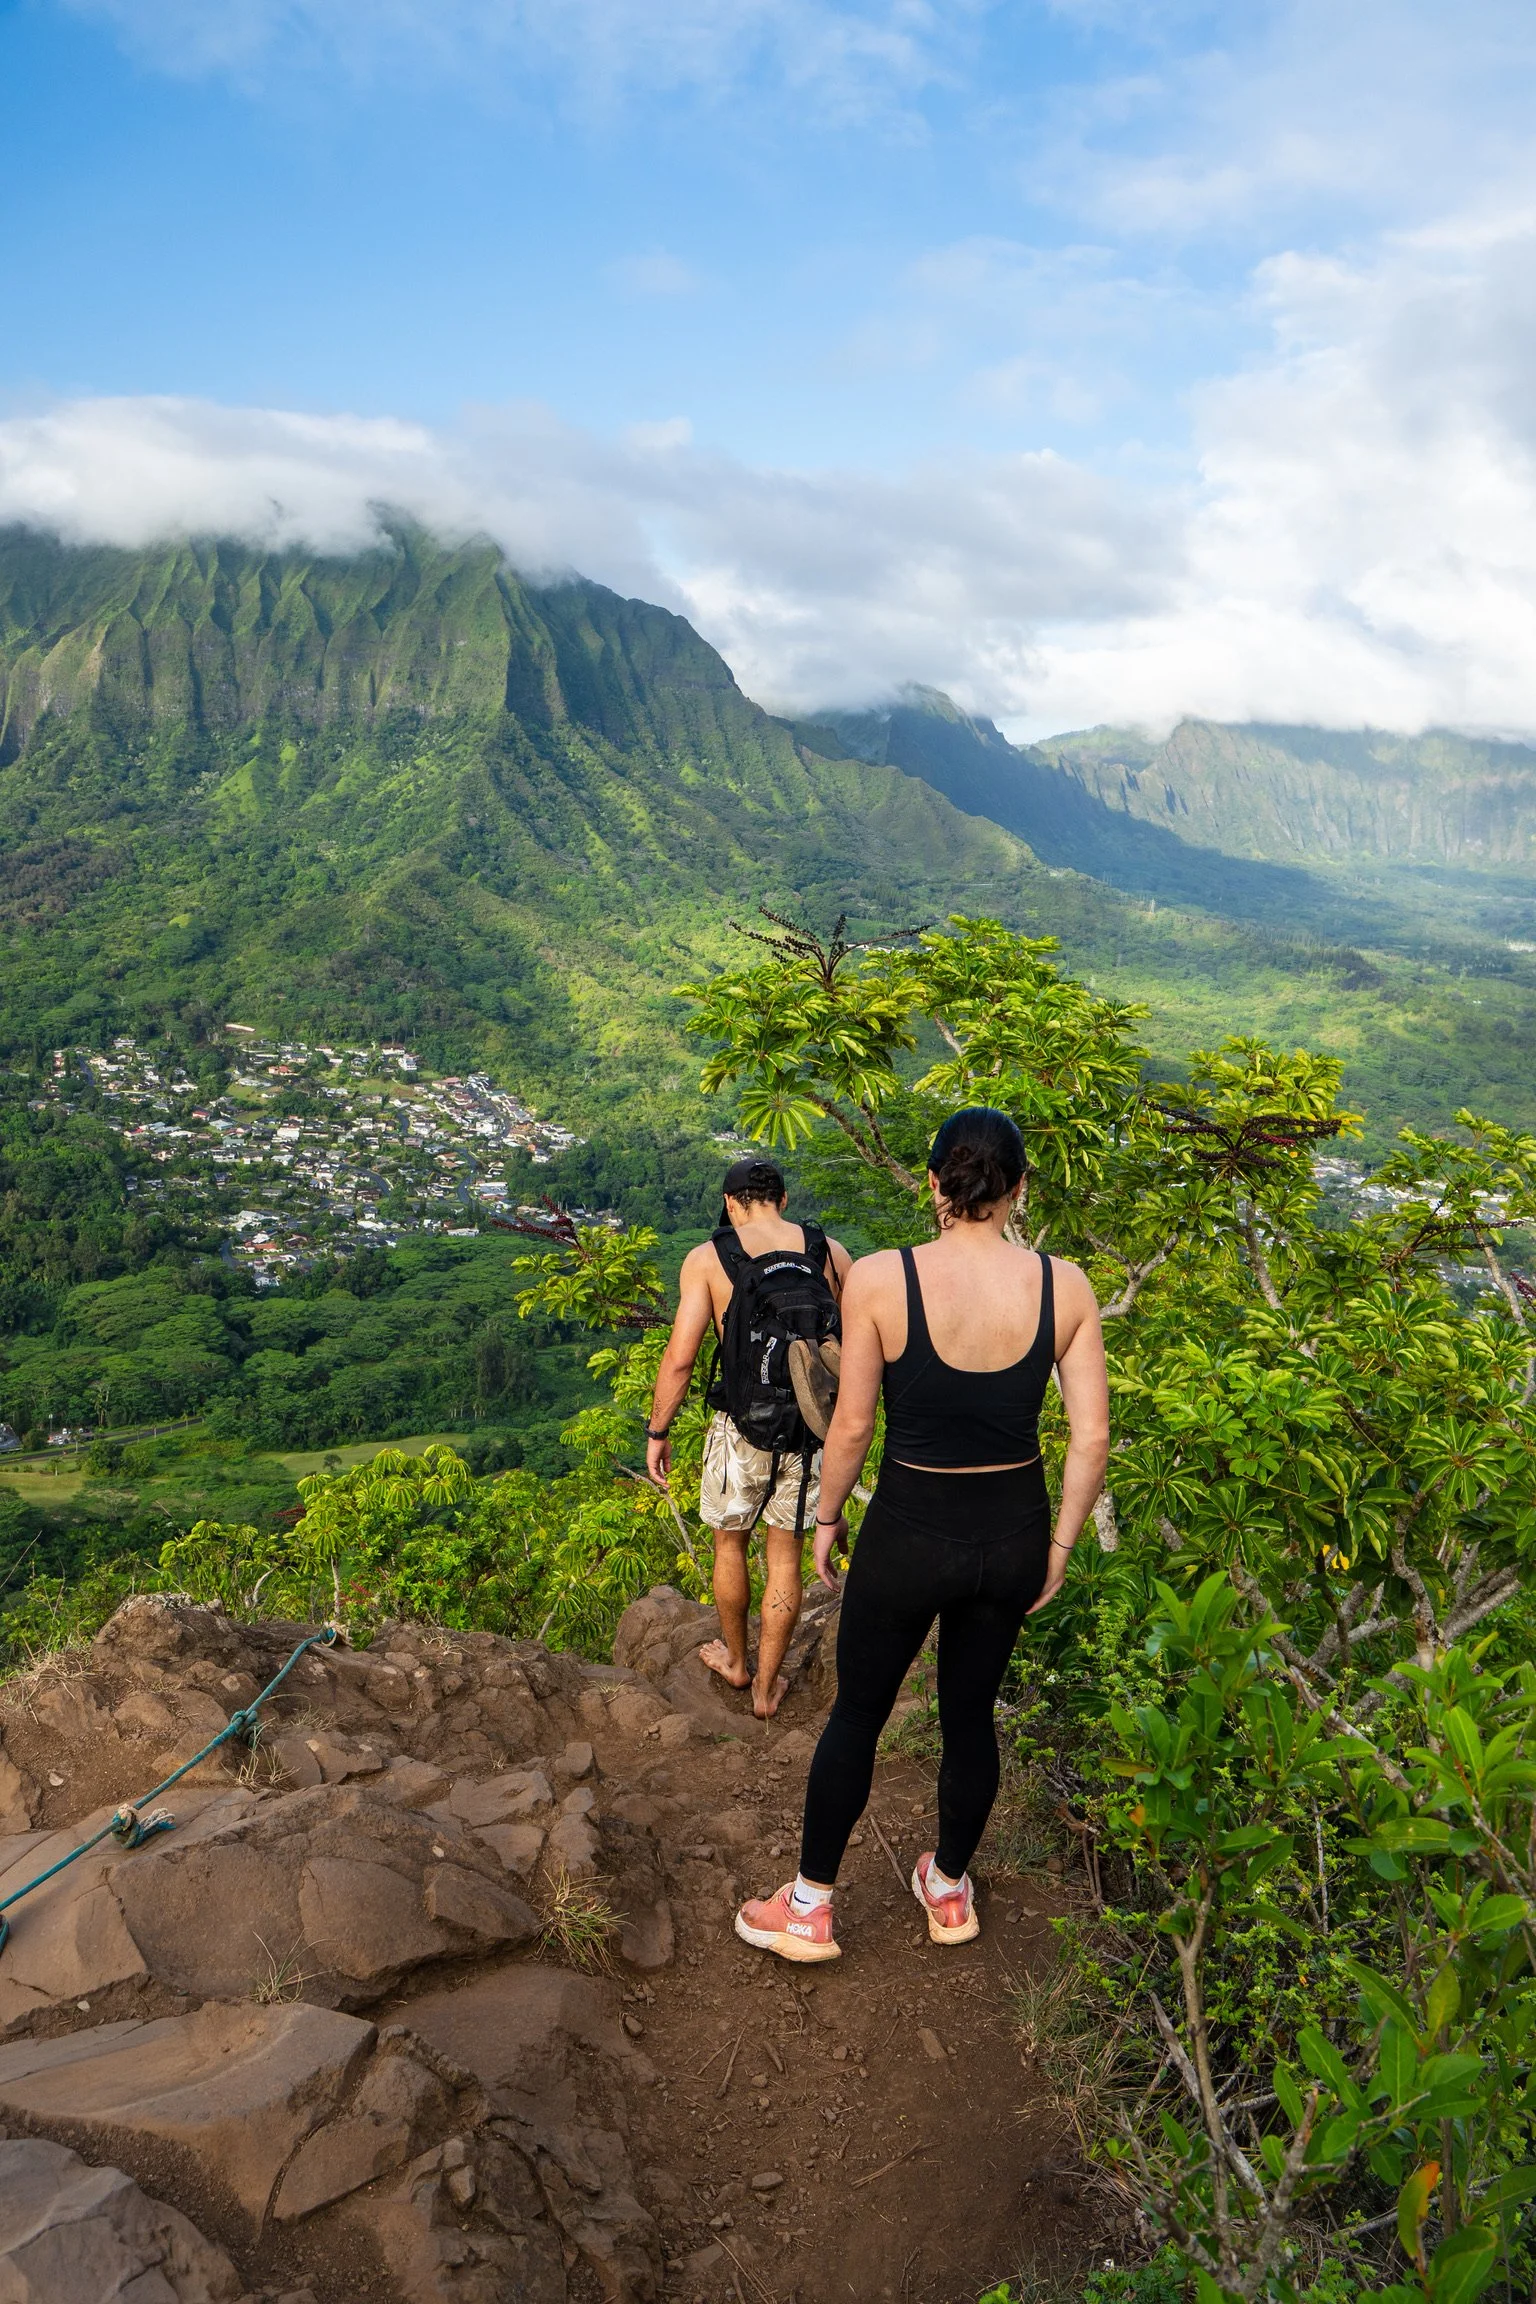
Beyond Peak 1, the trail becomes more technical, with sections that require basic scrambling, use of ropes, and careful foot placement. The ridge narrows in places, but the route remains manageable for hikers who are comfortable with exposure and have experience navigating uneven terrain.
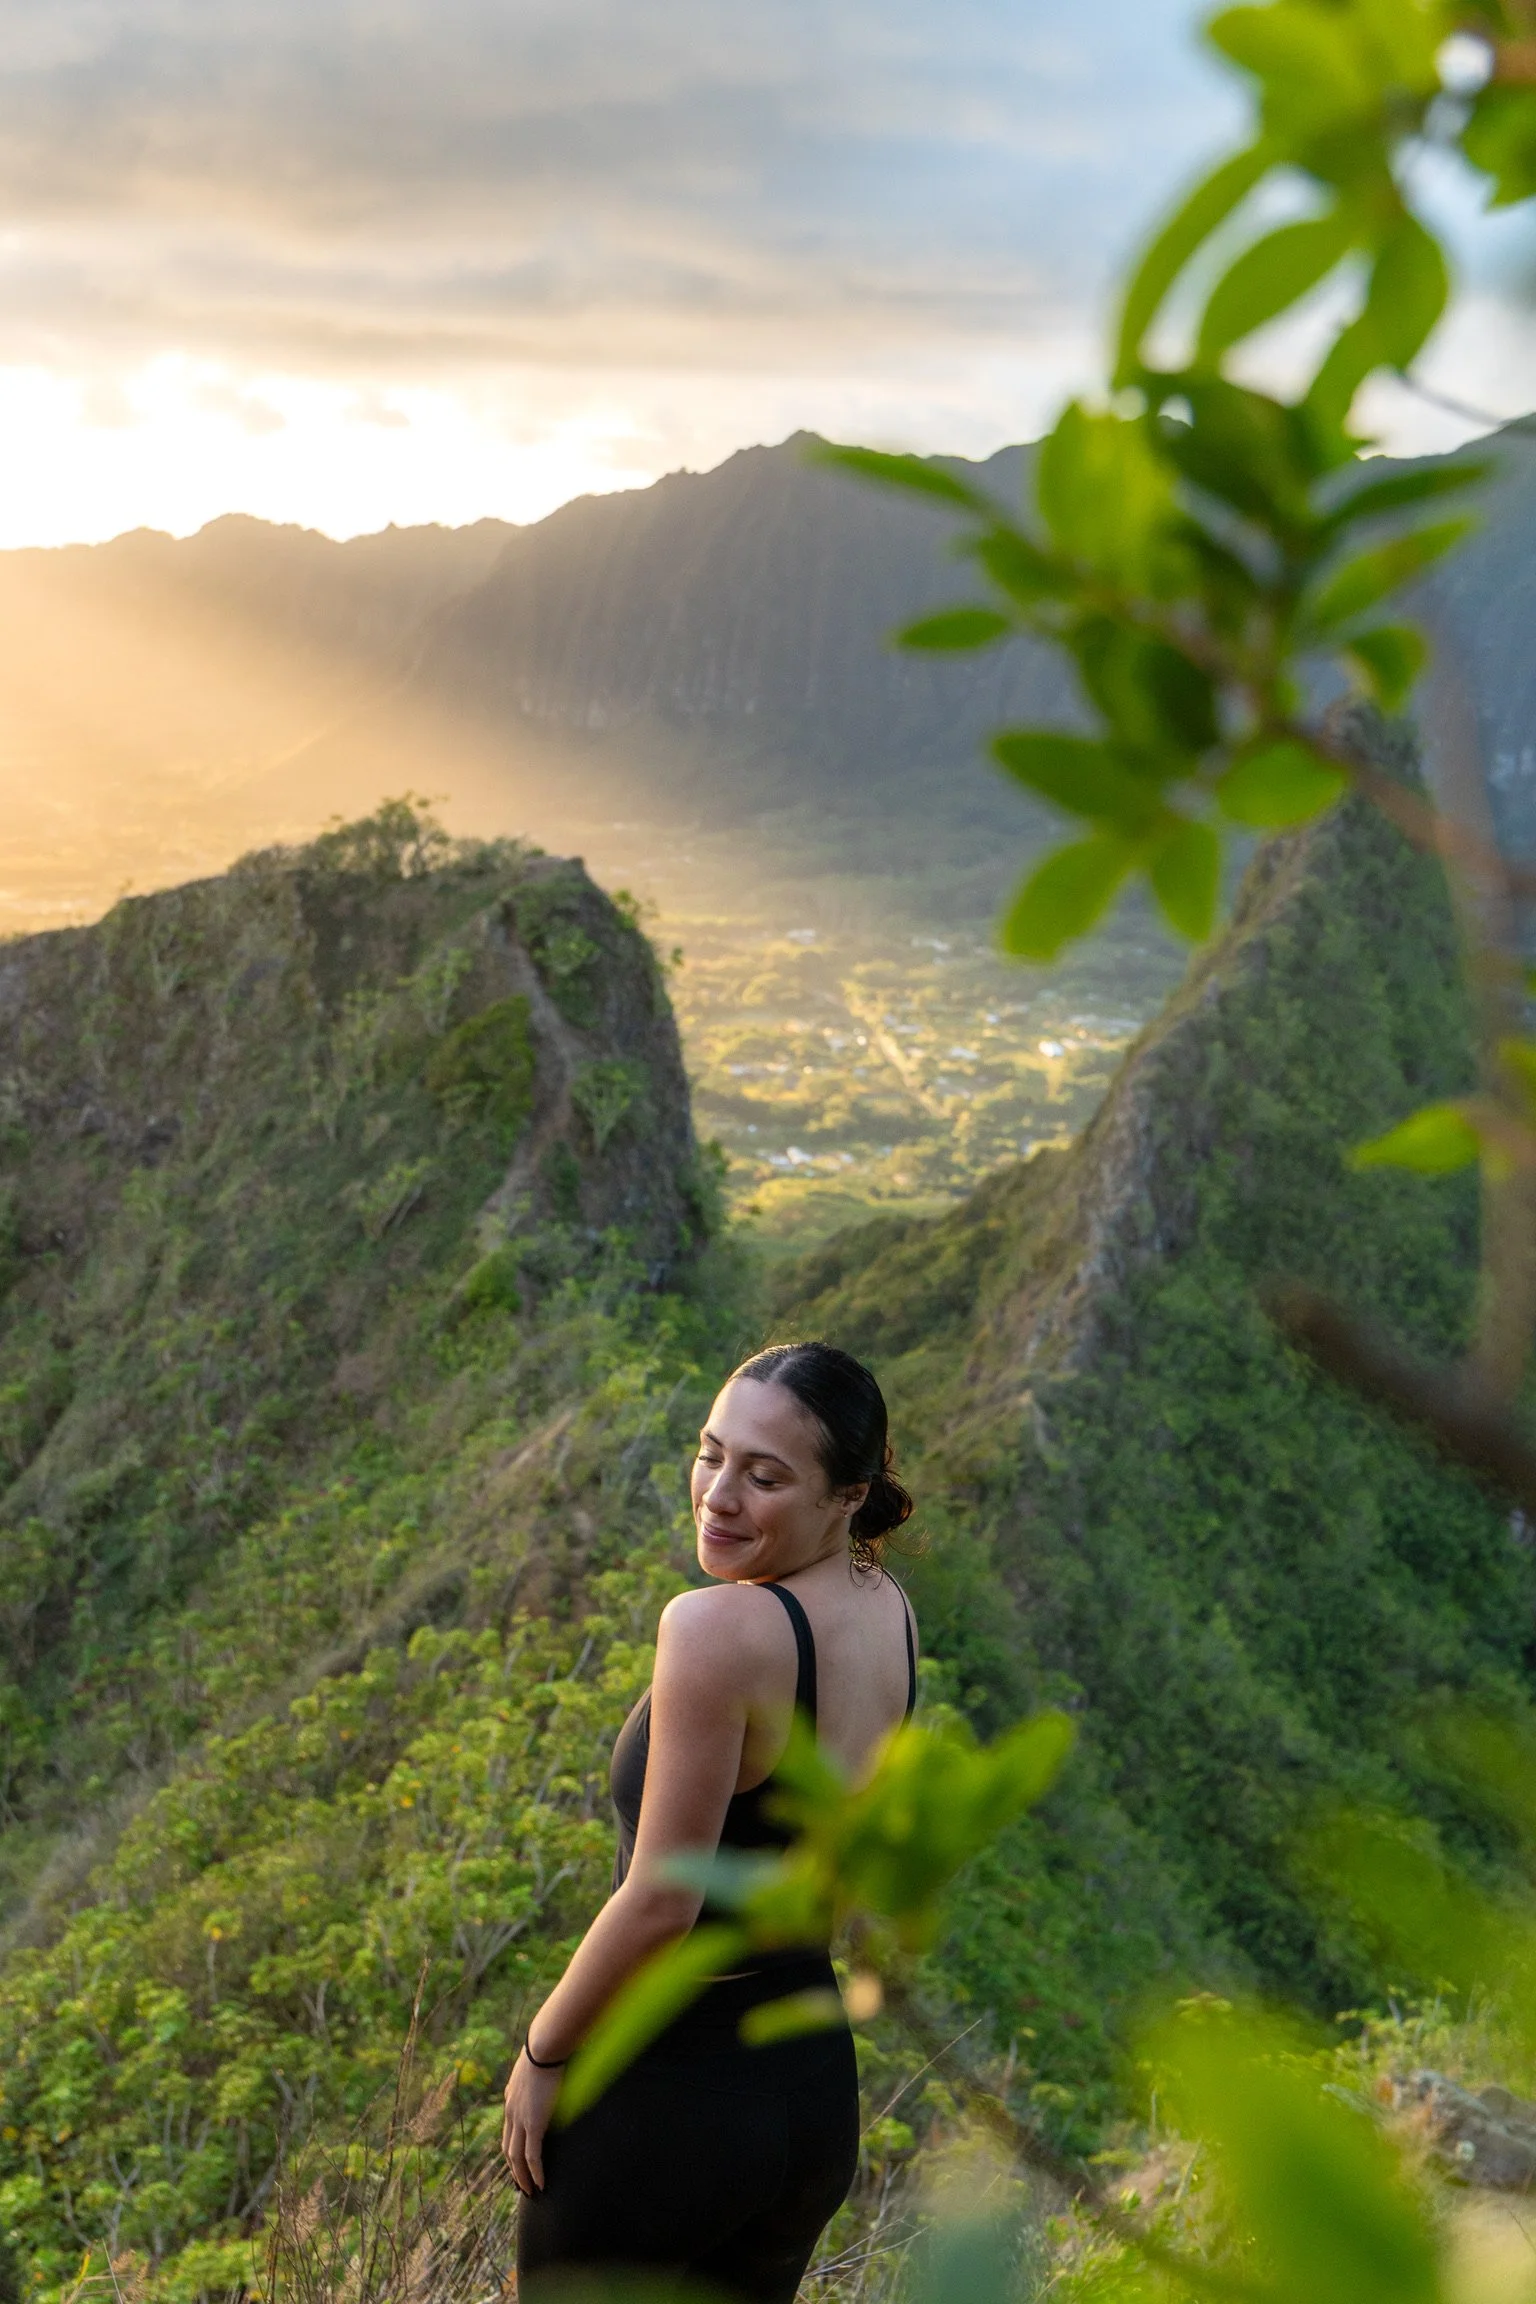
Peak 2 rewards those efforts with expansive views and a strong sense of accomplishment, without committing to the most committing terrain farther along the trail. This makes it the most common turnaround point for experienced hikers who want a challenge without pushing beyond their comfort level.
Good judgment matters here — not because the trail is extreme, but because conditions, fatigue, and confidence all play a role in deciding whether to continue.
Peak 2 felt like the right balance between challenge and comfort. There was enough space to pause, take in the views, and capture photos without feeling rushed. This was one of the spots where I felt confident slowing down, knowing I had solid footing and room to move safely while using my camera and peak 2 had the best view of peak 3.
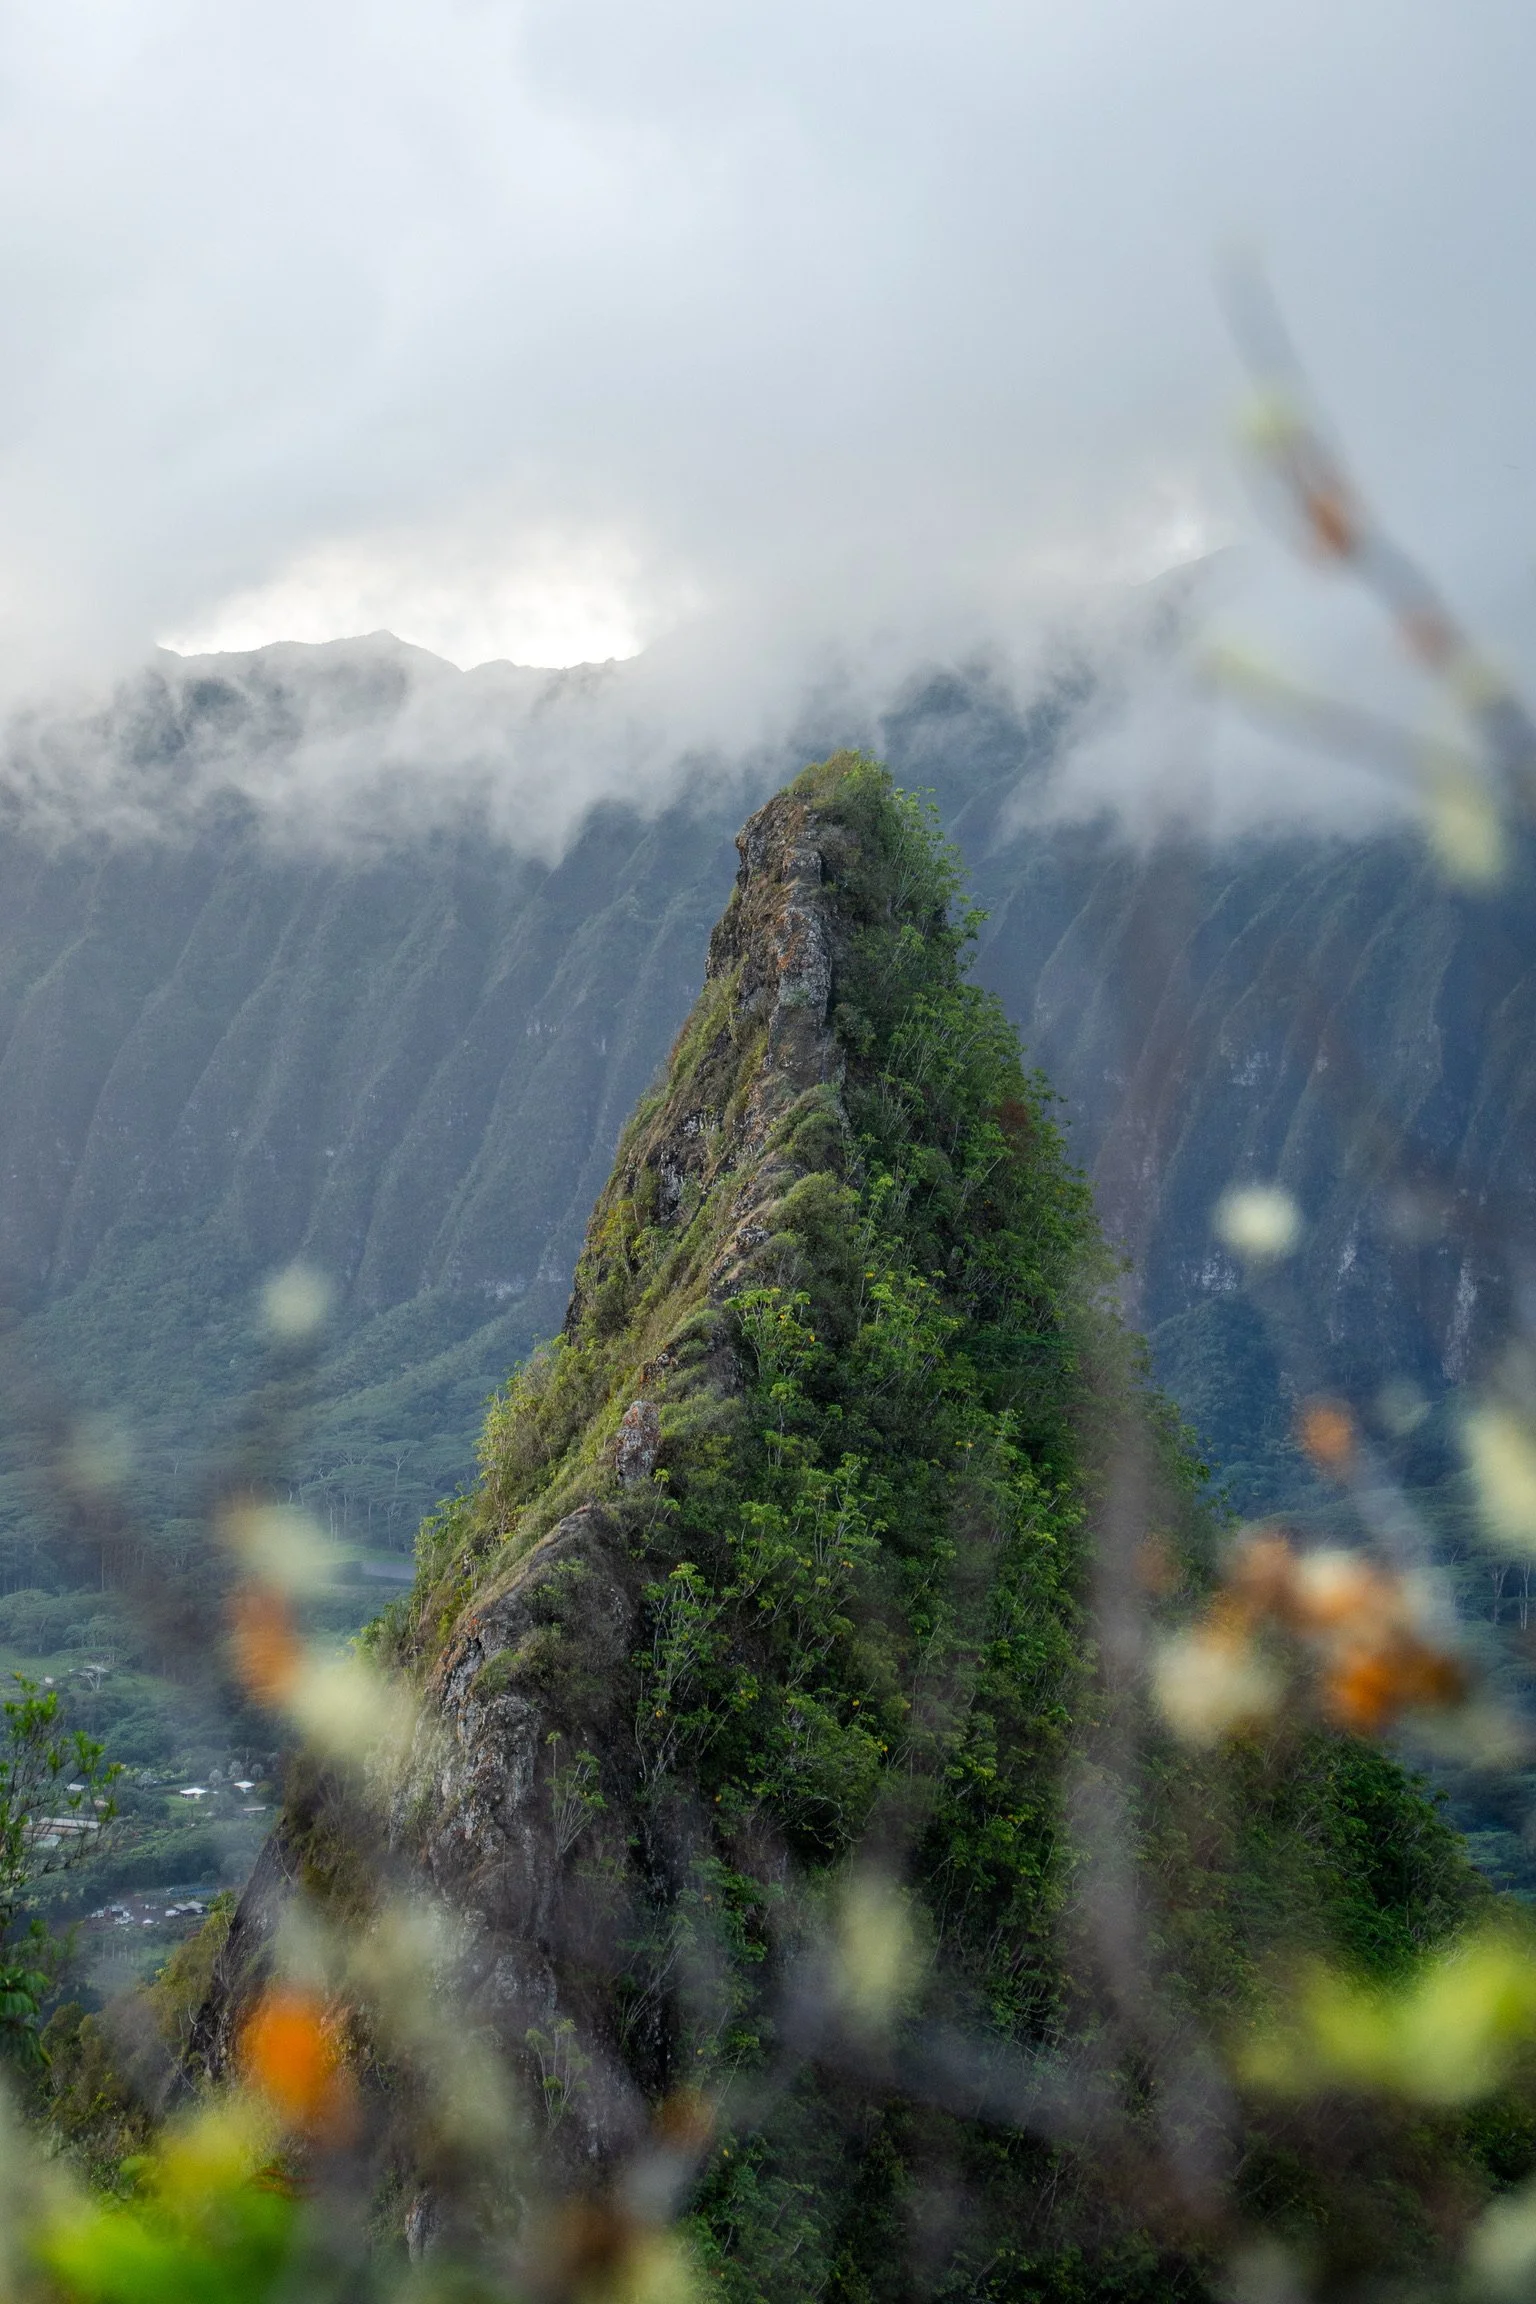
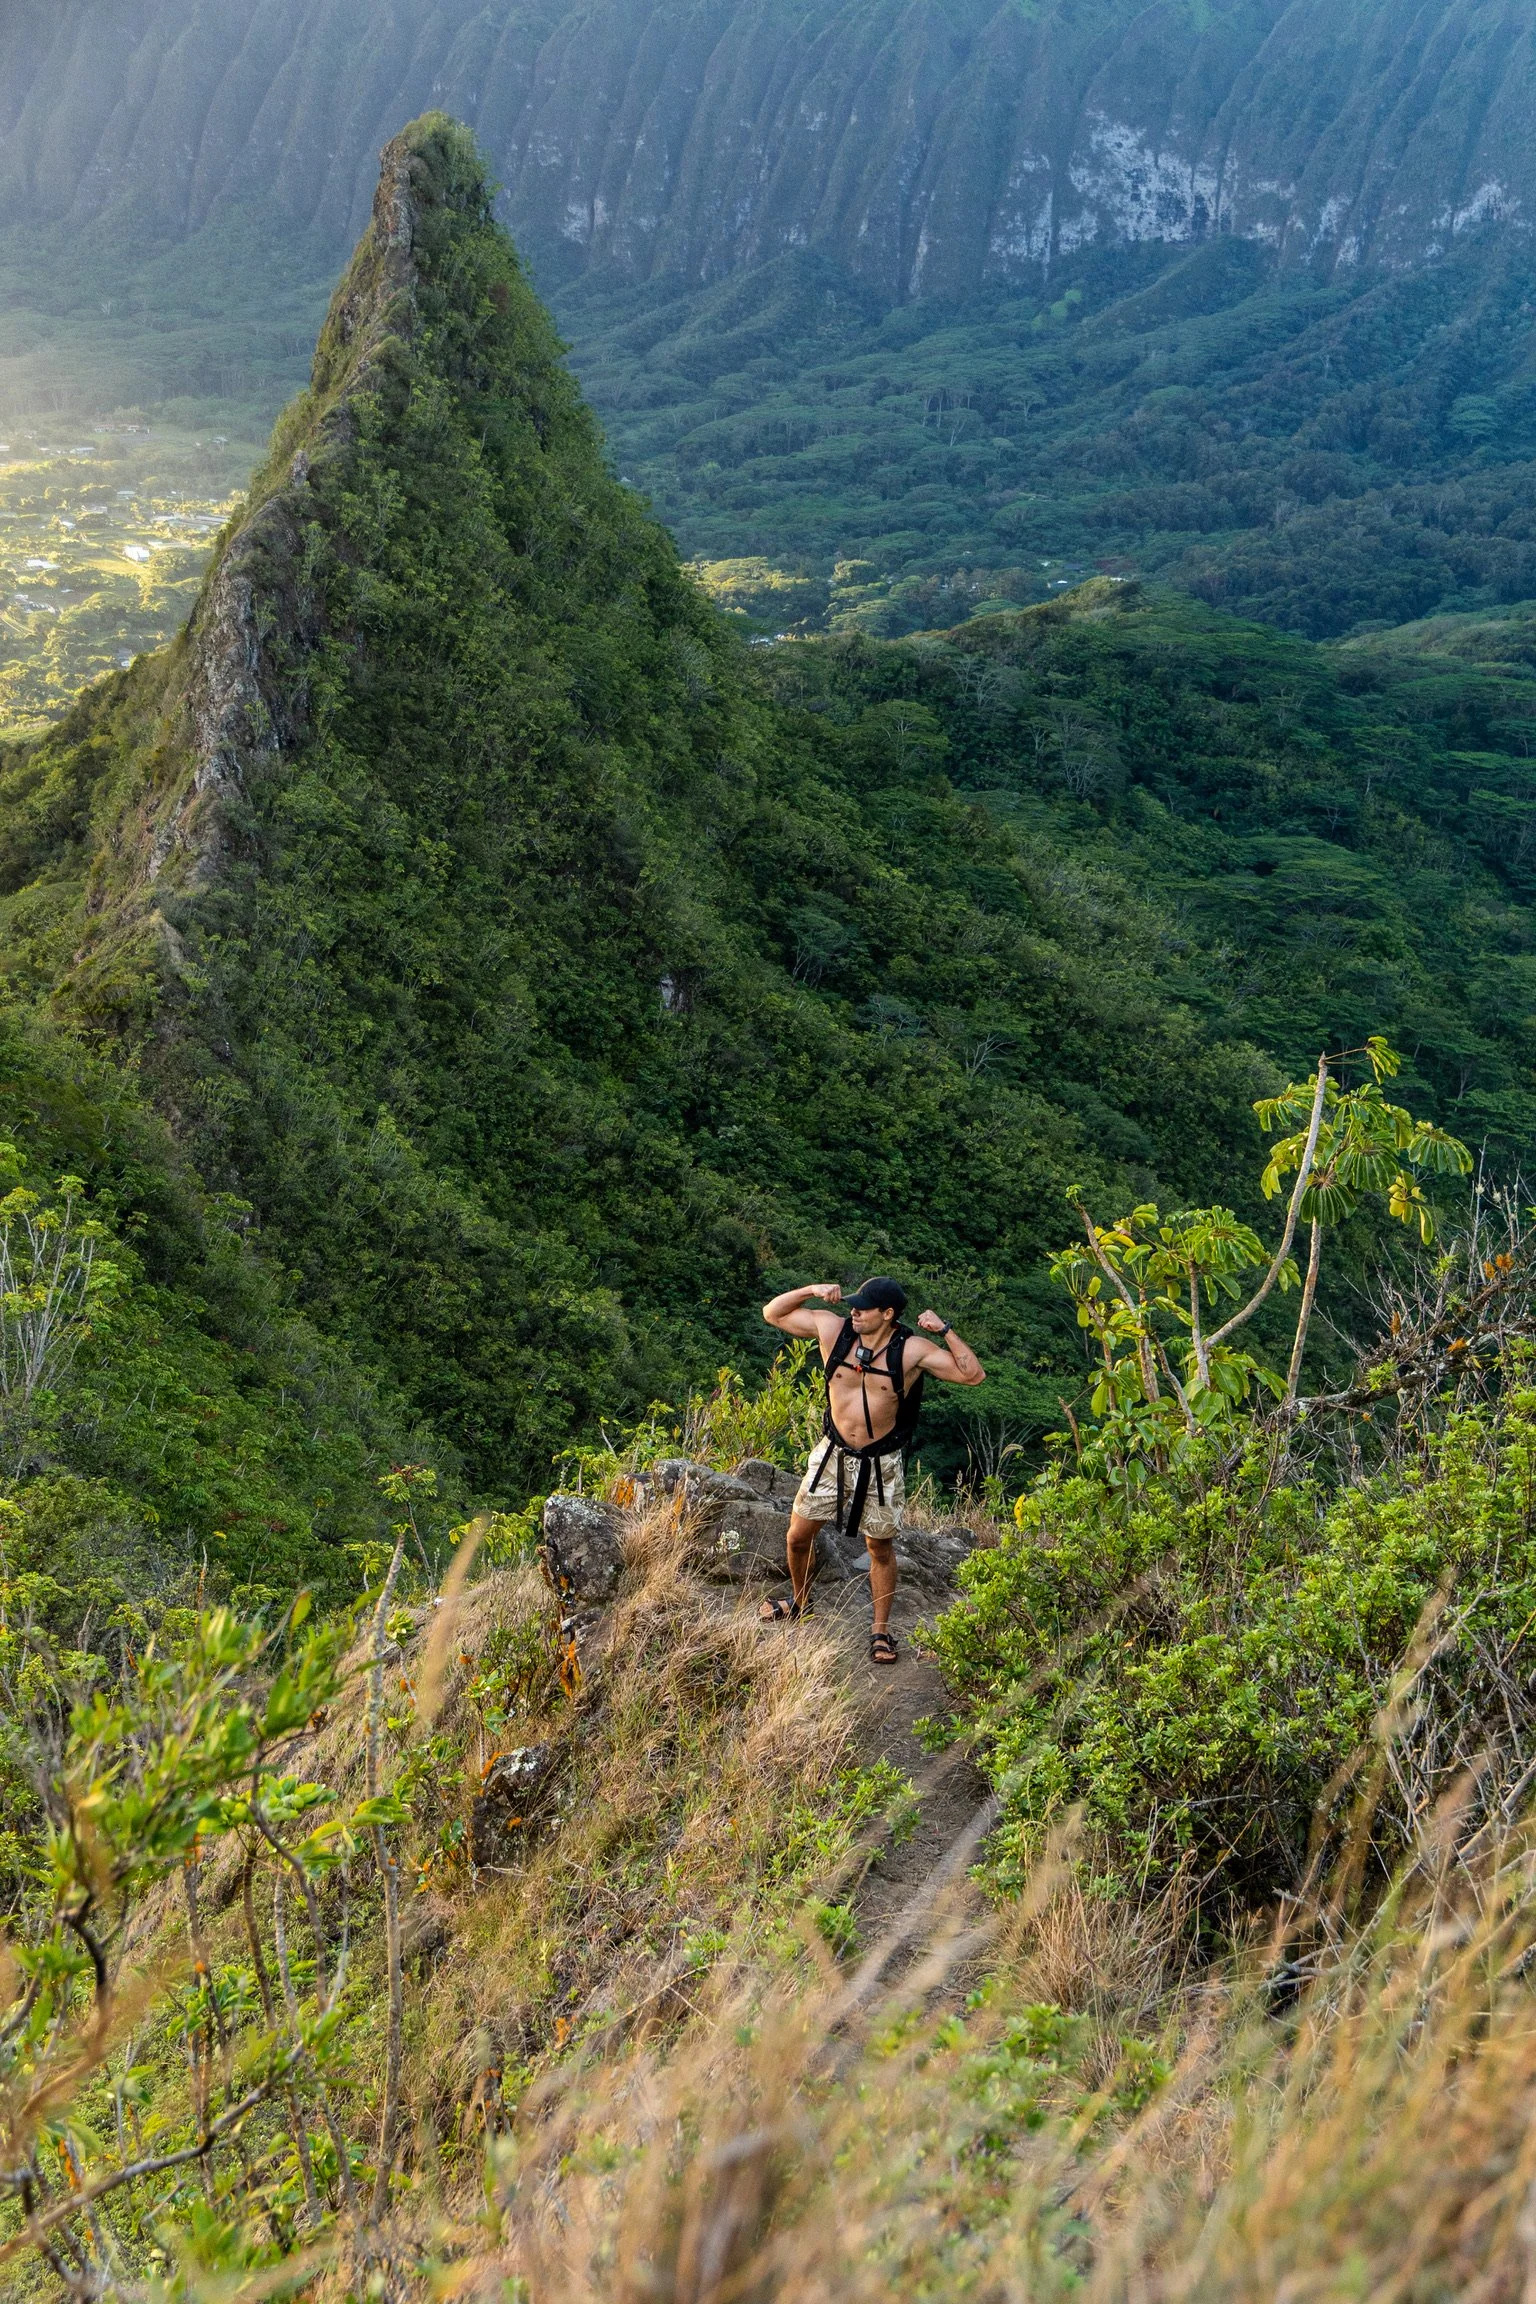
Peak 3: Optional and Best Left to Very Experienced Hikers
The final stretch toward Peak 3 is more committing and sees far less traffic. While it does not require technical climbing, it involves longer sections of exposed ridge and sustained focus.
This portion is best suited for hikers who are fully comfortable with scrambling, exposure, and route-finding, especially in variable wind conditions. For most hikers, Peaks 1 or 2 provide more than enough challenge and reward.
Olomana Trail Route Description
The trail begins near a residential area and quickly climbs through dense vegetation. Early sections are often muddy, especially after rain. As elevation increases, the trail steepens and transitions into ridge hiking.
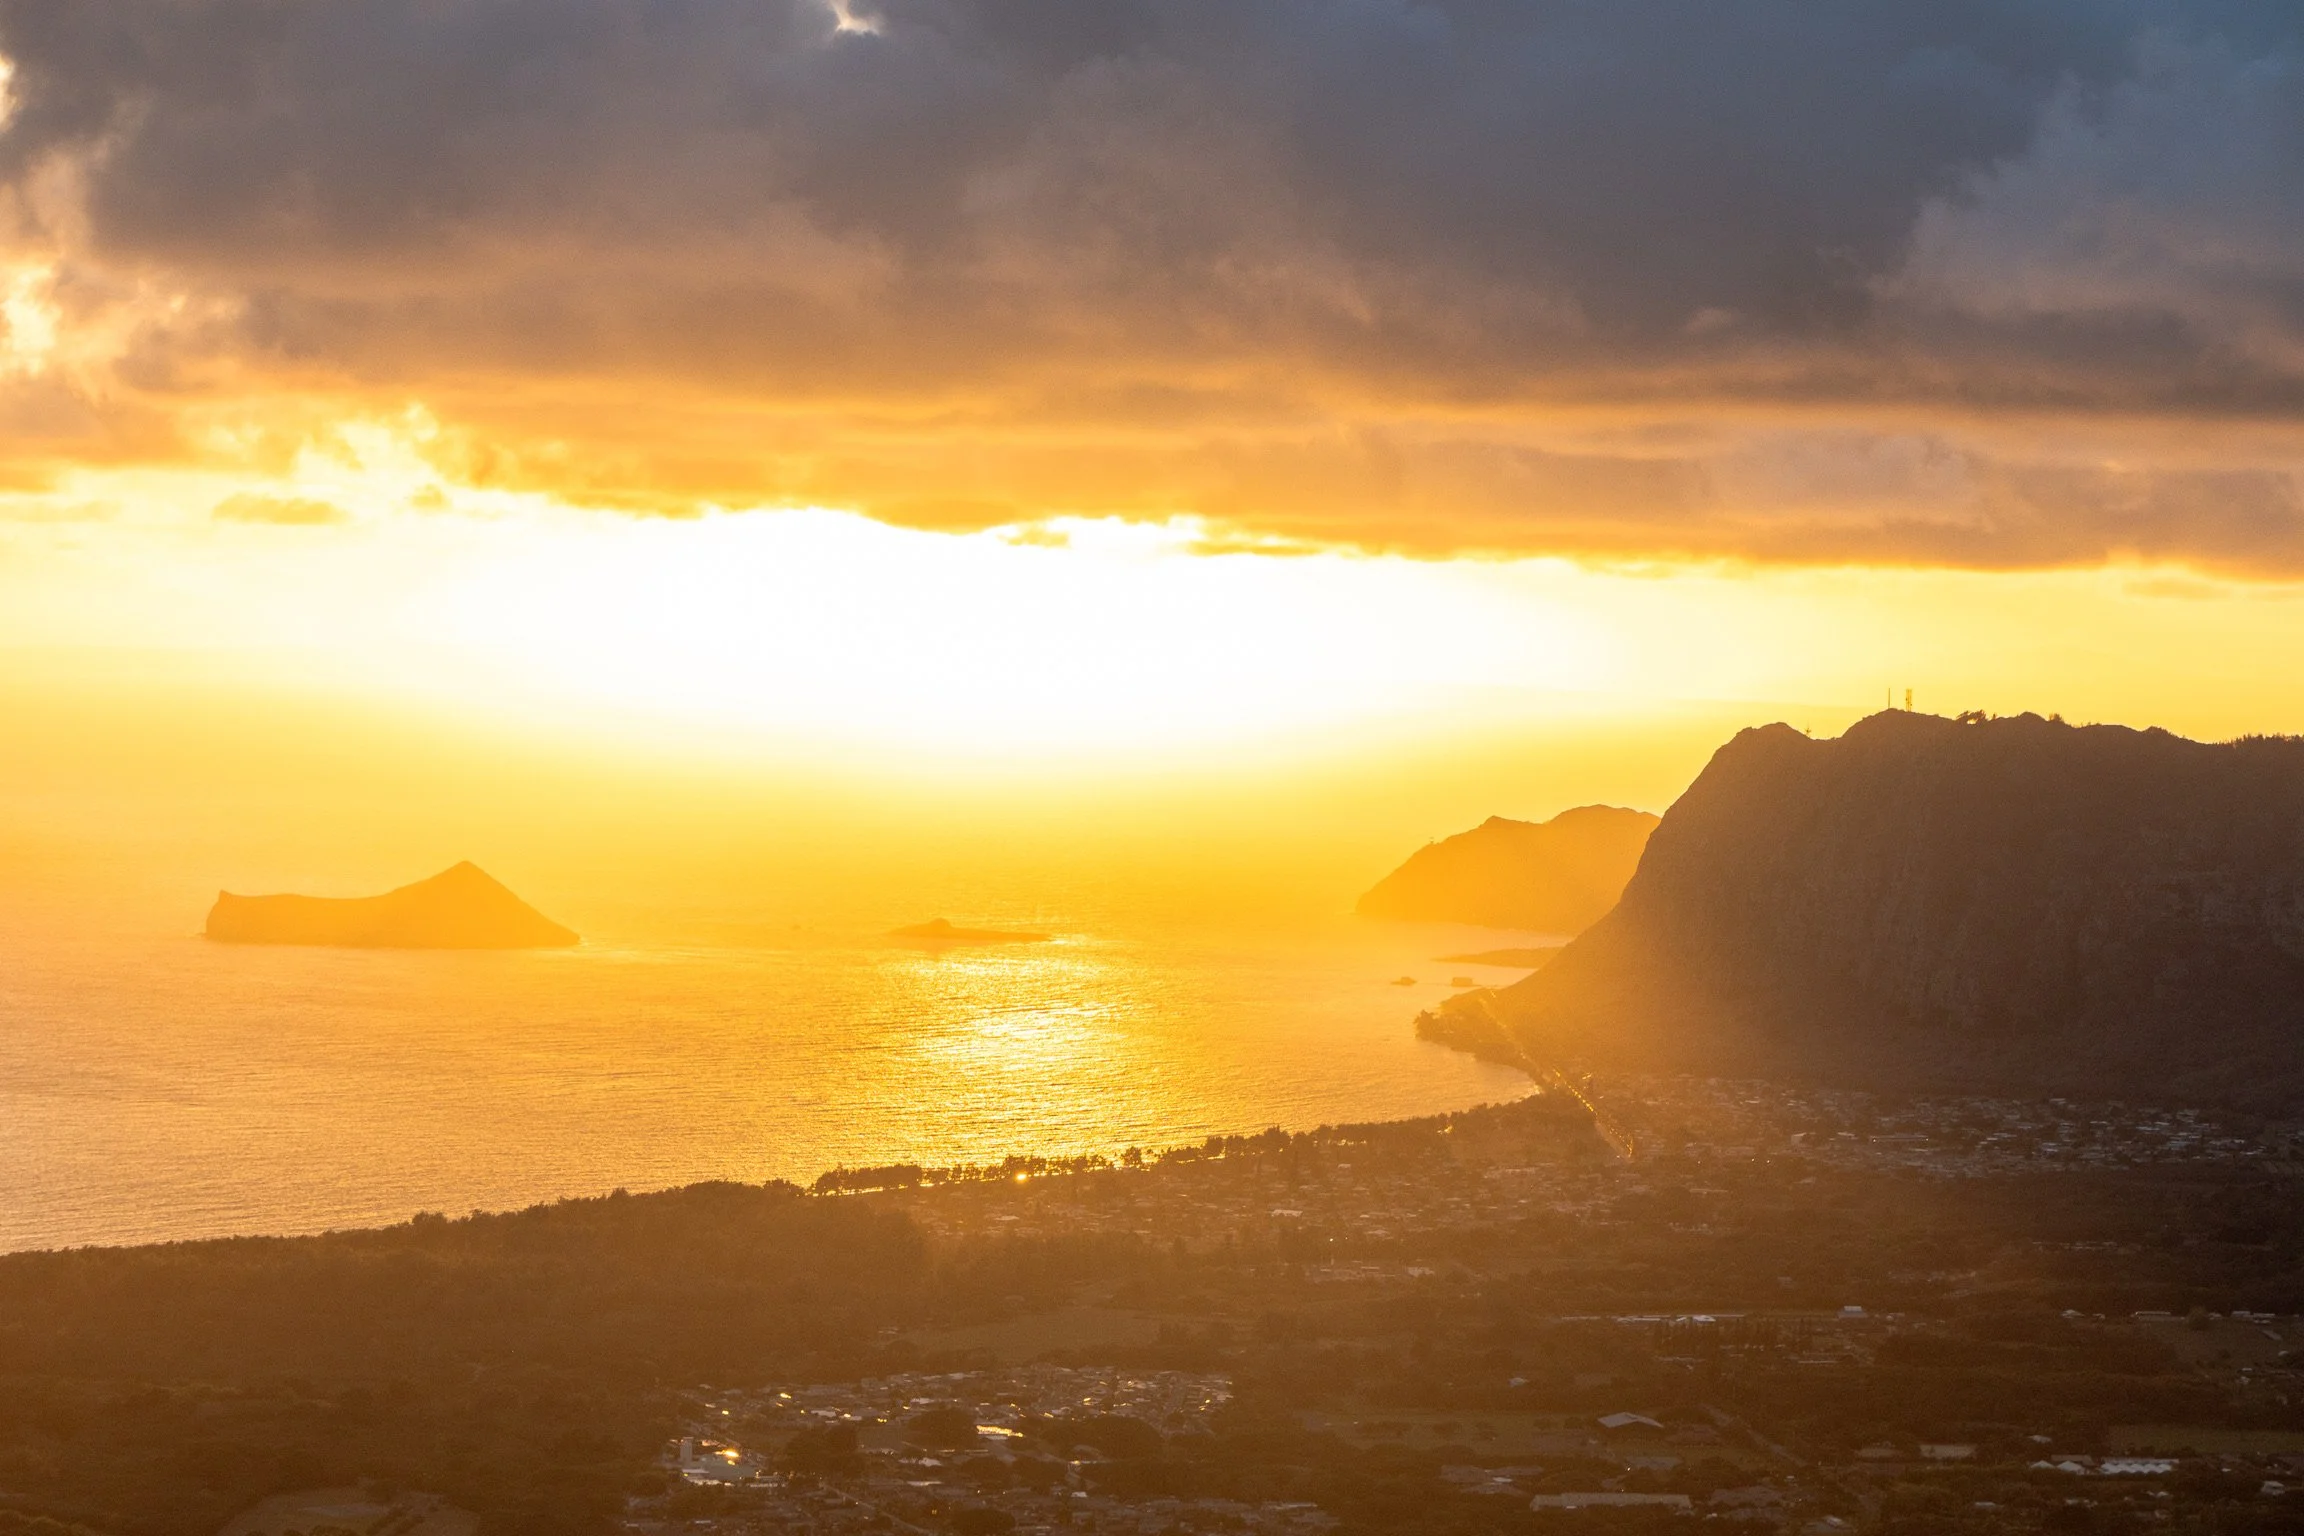
Ropes appear at steeper climbs and can be slick. The higher you go, the more exposed the trail becomes, offering sweeping views of the windward coast and surrounding mountains. Wind is common along the ridgeline and can impact both balance and photography.
There were multiple moments where I chose not to stop for photos, even when the view was tempting. On Olomana, moving deliberately and minimizing unnecessary stops is part of staying safe.
Best Time to Hike the Olomana Trail
Dry conditions are essential. Rain significantly increases risk, and this hike should be avoided entirely after storms.
Best time: Early morning on dry days
Best season: Late spring through early fall
Avoid: Wet conditions, strong wind advisories, or poor visibility
Weather and wind directly affect both safety and photo quality, so timing matters.
What to Bring on the Olomana Trail
Trail shoes with strong grip
Gloves (optional for rope sections)
Plenty of water and snacks
Lightweight camera setup
No handheld filming equipment
Camera Setup Used:
GoPro mounted to chest harness for hands-free filming
Sony a7CR with Tamron 17–70mm lens
Peak Design Capture Clip v3 attached to backpack strap
Keeping the camera secured to the Peak Design Capture Clip allowed for quick access without digging through a bag or stopping in exposed areas — a critical advantage on this trail.
Photography Tips for the Olomana Trail
Safety should dictate every photo you take on Olomana.
Peak 1 offers the best opportunities for deliberate compositions, while later sections are better documented through hands-free video. Wind is a constant factor, so faster shutter speeds help maintain sharpness. Cloud movement adds depth and mood, often making the scene more compelling than a clear sky.
One of the most important decisions I made was knowing when not to take a photo. On a hike like this, restraint matters just as much as creativity.

Olomana Trail Compared to Other Oahu Hikes
Compared to hikes like Koko Head, Crouching Lion, or Stairway to Heaven, Olomana stands apart due to its exposure and consequences. It’s not the longest hike on Oahu, but it demands more judgment than most.
This is a trail where turning back is often the smartest move.
Is the Olomana Trail Worth It?
100% yes. For experienced hikers who understand the risks and are willing to turn around when conditions or comfort levels change, the Olomana Trail can be incredibly rewarding. For others, it’s a hike best admired from below.
Reaching Peak 2 alone offers incredible views and a serious challenge — and stopping there is a decision worth respecting.
The Mt. Olomana Trail isn’t about checking off all three peaks. It’s about awareness, restraint, and knowing your limits. Whether you hike part of the trail or simply study its reputation, Olomana deserves respect.
If you go, go prepared — and be willing to turn back if you ever feel unsafe.
View Our Hawaii Travel Print Collection


Travel Tips and Tricks